

How to set up three-point lighting for corporate video
A three-point lighting setup for corporate video doesn’t need equal brightness from every light. Start with the key light about 45 degrees to one side of the subject, then balance the fill for a key-to-fill ratio near 1.5:1 for an inviting, dimensional look. Add a backlight behind the subject to create separation from the background.
It’s easy to assume that brighter fill makes a corporate interview look more polished. Too much fill can flatten facial features, while too little can make the image feel more dramatic than the message requires. The key-to-fill balance is the practical control for shaping that impression.
This guide explains where to place each light, how to set and adjust the fill, and how diffusion and bounce can soften contrast. You’ll also learn how to adapt the arrangement for interviews and location shoots, where room layout, ambient light and the background all affect the result.
Key Takeaways
- Place the key light slightly to one side of the camera, then position the fill opposite it to control shadows.
- Adjust the key-to-fill balance to shape the image: a closer balance can feel more even, while a stronger key preserves more contrast.
- Use diffusion to soften a direct source, or bounce light off a reflector or surface for a broader, gentler fill.
- Adapt the arrangement to the interview space by managing ambient light, background separation and the available room for each fixture.
- For corporate and commercial footage, balance dimension with a clear, approachable look rather than defaulting to a dramatic contrast.
Fill light placement and intensity
Place the fill opposite the key light to soften its shadows, then adjust brightness until the subject’s face retains useful detail. To avoid glare on glasses, move the fill away from the reflection angle. Control harsh shadows by changing the fill’s position or output, and limit background spill by aiming it narrowly.
-
Position the Fill Light
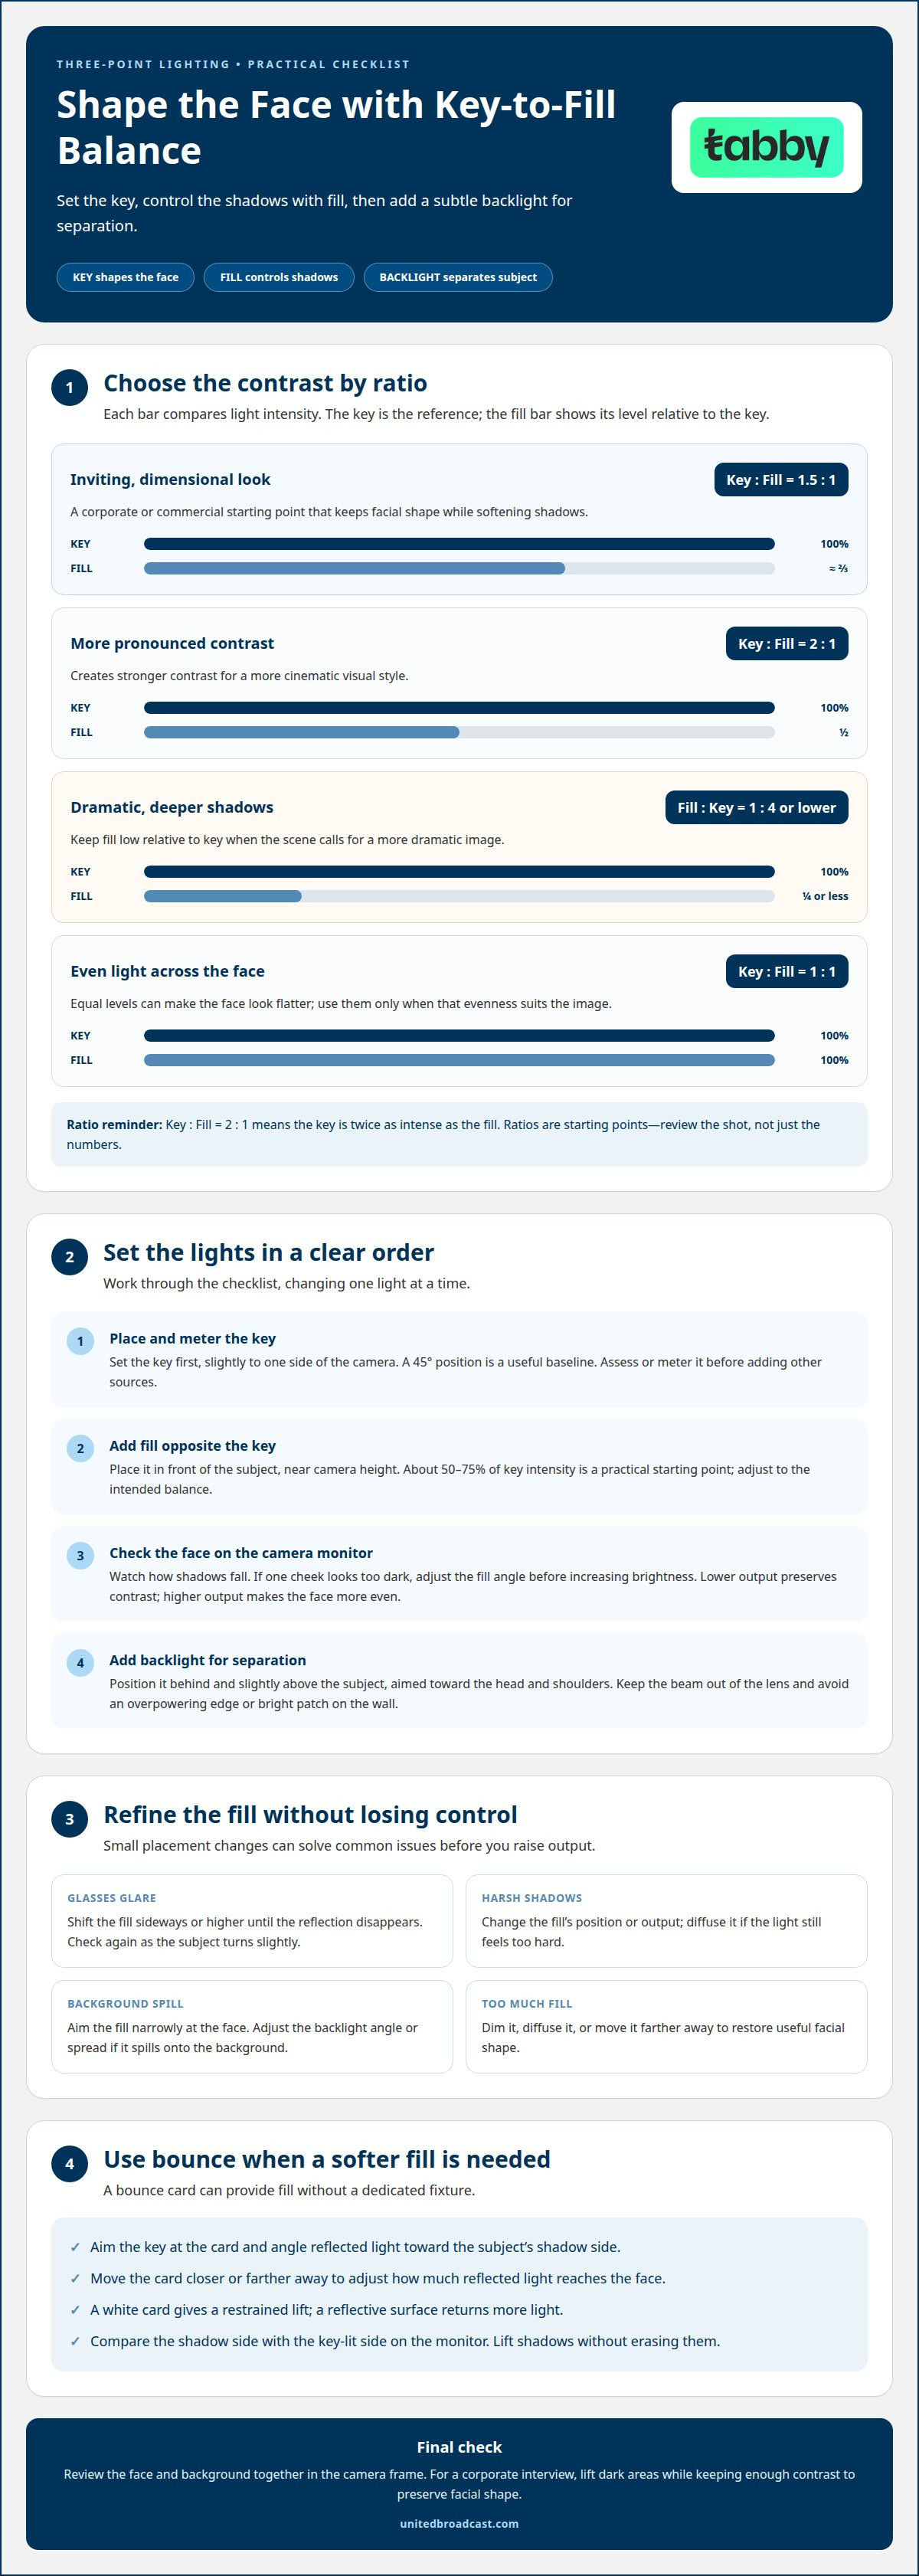
Place the fill in front of the subject, opposite the key and near camera height. Start with it angled toward the subject, then watch how the key’s shadows fall across the face. Move the fill to soften those shadows without removing all facial shape. If one cheek still looks too dark, adjust the angle before increasing brightness.
-
Set Fill-Light Brightness
Set the fill to about 50-75% of the key light’s intensity as a practical starting point. Lower output preserves stronger contrast; raising it makes the face more evenly lit. Review the subject’s face on the camera monitor, not only by eye in the room. If the fill looks too bright, dim it, diffuse it or move it farther away.
-
Avoid Glare and Background Spill
To prevent glare on glasses, shift the fill sideways or higher until its reflection disappears from the lenses. Check the image as the subject turns slightly, since a small head movement can bring the glare back. Soften the fill or change its angle to control harsh shadows. Aim it at the face, not across the room, to reduce unwanted light on the background.
-
Place the Backlight for Separation
Position the backlight behind and slightly above the subject, aimed toward the head and shoulders. It creates a subtle edge that separates the subject from the background. Keep the beam out of the lens and avoid a bright patch on the wall. If light spills onto the background, adjust the angle or narrow the spread. The edge should be distinct, not overpowering.
Make one adjustment at a time, then review the face and background together in the camera frame. For a corporate interview, the fill should lift dark areas while leaving enough contrast for facial shape. Professional lighting equipment supports control over placement and output as the setup is refined.
The fill can sit 3 feet from the subject at 15 or 25 degrees. For marketing and commercial situations, 85-95% of the key light's intensity creates a more even look; recommendations place output between 30% and 60%, while 90 produces a rather even look.
Key-to-fill ratios for different moods
Balance the key and fill to set the image’s contrast, then add the backlight for separation. Meter the key first, add the fill and compare readings, then switch on the backlight and review the combined image on the camera monitor.
-
Choose a Key-to-Fill Ratio
Choose a key-to-fill ratio based on the tone the scene needs. A 1.5:1 ratio can give corporate or commercial footage an inviting look while retaining facial shape. A 2:1 ratio creates more pronounced contrast for a cinematic visual style. At 1:1, the face may look flatter, so avoid equal levels when you want visible dimension. Treat each ratio as a starting point, not a substitute for reviewing the shot.
For a more dramatic image, reduce fill relative to key; a fill-to-key ratio of 1:4 or lower leaves deeper shadows. Keep the distinction clear: a key-to-fill ratio of 2:1 means the key is twice as intense as the fill. A softer, brighter mood calls for less contrast than this dramatic treatment.
-
Balance and Meter the Lights
Set the key first, then measure or assess it on its own before adding other sources. Keep the key’s direction consistent with the subject’s face; the familiar 45-degree position gives a useful baseline. Add the fill and adjust its output until the intended ratio appears in the meter readings or on the camera image. Change one light at a time, so each adjustment has a visible effect.
With the backlight on, inspect the subject’s outline against the background. The key shapes the face, the fill controls shadow density, and the backlight adds edge separation. If the outline draws attention away from the face, reduce the backlight or reposition it. Review the whole frame after each change, because the final visual balance matters more than an isolated reading.
-
Use a Bounce Card as Fill
Use a bounce card when you need fill without a dedicated fixture. Aim the key at the card and angle the reflected light toward the subject’s shadow side. This can make a two-light setup workable, with the card providing softer fill. Move it closer or farther away to adjust how much reflected light reaches the face.
Check that the bounce lifts shadows without erasing them. A white card gives a restrained lift, while a reflective surface returns more light and can alter the scene’s contrast. Compare the shadow side with the key-lit side on the monitor, then reposition the card if the image looks too even. For tailored lighting guidance, discuss the desired mood and shooting setup with the team.
Softening light with diffusion and bounce
Soften a direct source with diffusion, or redirect light from a surface using bounce. In a three-point arrangement, these techniques refine contrast and help control how light falls on the subject and background.
-
Choose Softbox and Diffusion Modifiers
Fit a softbox or diffusion material to the key when its direct beam creates hard-edged shadows. The larger the illuminated surface appears from the subject’s position, the broader and softer the light tends to look. A softbox also helps contain spill compared with an uncovered source. Check the subject’s face and the background in the camera frame, since moving the modifier changes both softness and spread.
-
Diffuse Overly Bright Lights
Place diffusion between an overly bright fixture and the subject to spread and soften the beam. This can reduce sharp contrast without changing the light’s direction. Recheck exposure on the camera after adding diffusion, because the material also reduces the light reaching the subject. If the image is still too bright, dim the fixture or move it farther away.
- Use a bounce card when the shadow side needs a gentler lift than direct fill provides. Aim the key at a white card, then angle the reflected light toward the subject. Move the card until it brightens facial shadows without washing out their shape. A wall or pale surface can also reflect light, but its colour may affect the result. Avoid coloured walls in the bounce path when accurate skin tones matter.
- Control spill by turning the softbox or bounce surface toward the subject, not the background. Watch for light falling on a wall or distracting detail behind the interviewee. If it does, rotate the modifier, narrow the beam with the fixture’s controls, or reposition the subject. Keep the background lighting intentional: a textured wall can remain visible, while an uncluttered backdrop benefits from limited spill.
- Review the image after each change, using the same camera framing and exposure. First compare the key-lit cheek with the shadow side, then check whether the background has brightened. Make small adjustments to the diffusion rather than changing the modifier, fixture position and output all at once. For professional lighting choices, consider how softboxes and diffusion will work with the fixture and shooting space.
Adapting three-point lighting to interviews and locations
A three-point setup uses a key, fill and backlight. For a two-light interview, a bounce card can provide fill. For a corporate interview, place the key to one side of the camera, the fill opposite it, and the backlight behind the subject.
-
Position Lights for a Corporate Interview
Set the key about 45 degrees to one side of the camera and aim it toward the subject. Position the fill on the opposite side, then place the backlight behind and slightly above the subject. A three-point lighting setup for corporate video gives each source a distinct role, so check the camera frame for unwanted background spill and distracting highlights. Adjust the backlight if its edge competes with the interviewee.
-
Adapt the Setup for Interviews
Use three separate fixtures when you need independent control of facial contrast, fill and background separation. For a more compact interview arrangement, use the key as the main source and a bounce card to return light to the shadows. This two-light approach uses fewer fixtures, but the card does not provide a separate backlight. Check the frame to see whether the subject still stands clearly apart from the background.
- Assess the office before choosing the camera position. Windows, bright screens and pale walls can add light or reflections that change the image. Frame the interview first, then position the key to shape the subject’s face without obstructing the eyeline. Consider the room layout, including doors and regular walking routes, before placing stands or running cables.
- Choose fixture output based on ambient light, distance and diffusion. Daylight from a large office window may compete with a nearby fixture, while a controlled interior may need less output. Adjust the key first, then balance the other sources through the camera. Don’t choose wattage based on the room name alone: distance, window light and framing all affect the result.
- Plan for power access and clear movement through the office. Keep stands stable and route cables away from the interviewee’s path and the camera operator’s work area. Don’t block a doorway or regular passage. Before recording, review the room layout and camera frame together, then move any stand or cable that gets in the way.
- Adapt the backlight to the location and the background’s role in the shot. Aim it toward the subject’s head and shoulders for separation, or toward a textured background from an oblique angle to reveal its surface. For a three-point lighting setup for corporate video in a bright office, compare these effects through the camera before recording. Keep the background treatment subordinate to the subject and the message.
Lighting ratios for corporate and commercial video
For corporate and commercial footage, begin with a key-to-fill ratio near 1.5:1, then judge the image on camera. Match the lights’ colour to the room’s ambient light, and set the camera’s white balance to suit.
- Establish the key as the reference before balancing the other fixtures. For a direct interview, place it about 45 degrees to one side of the camera, then assess facial detail and the background. This direction creates visible modelling without making the lighting effect feel unnecessarily dramatic. Keep the subject’s position and camera framing consistent as you adjust the remaining sources.
- Set the fill to support the key, not compete with it. A 1.5:1 key-to-fill ratio is a useful corporate starting point because it retains some shadow detail and facial dimension. For a product demonstration or commercial close-up, a more even balance can make details easier to see. Avoid equal brightness by default, since a 1:1 balance may reduce dimension.
- Place the fill opposite the key, then inspect the shadow side of the face. If the result looks too flat, lower the fill; if shadows obscure expression, increase it gradually. Compare the image on the camera monitor after each adjustment. This shows whether the ratio supports the message, rather than merely producing a technically balanced meter reading.
- Keep the backlight controlled in relation to the fill. It should have similar or lower power than the fill, so the subject’s outline doesn’t become the brightest part of the frame. A 250-watt backlight can look too bright beside a 500-watt key, depending on placement and beam direction. Reduce its output or redirect it if the rim draws attention from the speaker.
- Match the colour temperature of the key, fill and backlight, then account for daylight or practical office fixtures. There is no single temperature for every corporate video. Choose a consistent colour appearance for the scene and set the camera’s white balance to match, rather than letting mixed sources shift skin tones.
- Assess the complete studio frame, including skin, clothing and background, before recording. A bright wall can make a balanced face appear darker, while a dark background can exaggerate the backlight. Adjust one source at a time, then review the overall effect. For a polished corporate look, prioritise clear facial detail, controlled contrast and consistent colour.
Match the colour temperature of the key, fill and backlight to the room’s ambient light. Set the camera’s white balance to match that lighting for consistent colour.
United Broadcast & Media Solutions (UBMS): Professional Video Cameras
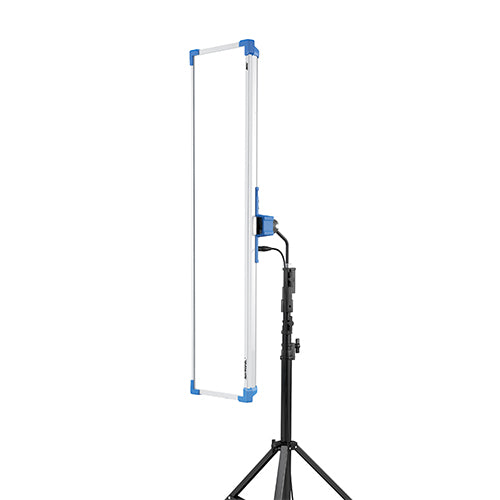
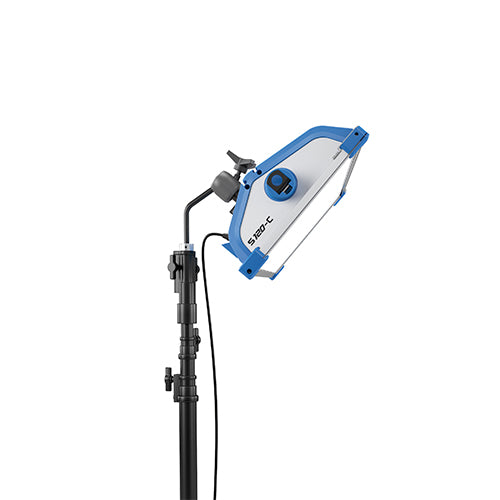
United Broadcast & Media Solutions (UBMS) supplies professional video cameras and lighting equipment for corporate video workflows. When building a lighting setup around a camera, choose equipment according to the shooting environment, desired image and how the camera and lenses will work together.
UBMS also supplies digital cinema cameras and cinema lenses, alongside professional lighting equipment. These products are relevant when selecting or updating the tools used to capture interviews, presentations or other corporate footage. The lighting principles in this guide help define the look; your equipment should support the production’s practical requirements.
For equipment options suited to your corporate video workflow, contact United Broadcast & Media Solutions (UBMS).
Carry a Consistent Look Into Your Next Shoot
Treat the lighting plan as part of a wider visual approach, not a one-off arrangement. A consistent look helps connect interviews, leadership messages and office footage, even when each scene has a different background. Decide what the image should communicate, then align the camera framing and lighting choices with that intention.
For your next production, note the subject’s position, camera angle and fixture placement. These details give the team a practical reference for recreating the look or adapting it to another room. A three-point lighting setup for corporate video is more useful when it supports a repeatable workflow than when treated as a fixed formula for every scene.
United Broadcast & Media Solutions (UBMS) can help you choose camera and lens equipment for your production requirements.
Plan the next setup around the message, the subject and the space. A clear visual approach gives your team a strong foundation for the shoot.
Frequently Asked Questions
What are the key lights in a three-point lighting setup?
The three lights are the key, fill and backlight. The key establishes the main direction and shapes the face, while the fill controls how much detail remains in the shadows. The backlight separates the subject from the background. For a seated executive, assess all three in the camera frame so hair, clothing and backdrop remain distinct without competing for attention.
What lighting ratios work best for a professional corporate video?
A 1.5:1 key-to-fill ratio is a practical choice for a polished, approachable corporate image; a 2:1 ratio gives the scene more contrast. Consider the subject’s clothing and backdrop as well as facial modelling. A dark jacket against a dark wall may need more separation, while a close-up product demonstration may benefit from even illumination across visible details.
How do you set up three-point lighting in a small office or conference room?
Keep the setup compact by placing the camera first, then arranging the key and fill in the available space. If a separate fill fixture won’t fit, use a bounce card to reflect some key light back onto the subject. For an office interview, frame out distracting desk items and check for reflections from windows or bright screens before recording.
What light types and modifiers are best for corporate video three-point lighting?
Choose fixtures with controllable output and use diffusion when a direct beam creates hard edges. LED panels with a CRI of at least 95 are one option for accurate colour rendering. A softbox broadens and softens the source, while a bounce card can return light without adding another fixture. Check skin tones and background colour through the camera after modifying the source.


