

How to Reduce Video Noise in Low Light: A Practical Guide
What if cleaner low-light footage starts before you touch a denoising tool? If you’re learning how to reduce video noise in low light, you’ve likely seen grain and blotchy shadows become more obvious when you lift exposure. Raising exposure can also introduce motion blur or change a scene’s mood, while aggressive noise reduction may soften detail or create artifacts.
The most reliable approach is to capture as much usable light as the scene allows, then refine the image in post. That doesn’t mean flooding a carefully lit shot or sacrificing its atmosphere. It means making deliberate choices about lighting, exposure, camera settings, and equipment so the image retains detail without pushing shadows too far.
This guide explains why low-light noise appears and sets out a practical capture-to-post workflow for reducing it. You’ll learn how to balance exposure and motion, use available light effectively, choose camera settings with care, and apply denoising without erasing important texture. Whether you’re working with professional video cameras, digital cinema cameras, or lighting equipment, the aim is the same: cleaner footage that still looks true to the scene.
Key Takeaways
- Understand why noise becomes more visible in dark areas and how limited light affects the image signal.
- Balance ISO, aperture, and exposure to manage noise while preserving motion and depth of field.
- Compare adding light, adjusting camera settings, changing lenses, and denoising in post to choose the right option for the scene.
- Use a repeatable workflow for how to reduce video noise in low light, starting with the details that need to remain visible.
- Recognize when persistent noise points to a broader camera, lens, or lighting workflow issue.
Why does video noise appear in low light?
Video noise is unwanted variation in an image that makes areas look rough, unstable, or discoloured. It often stands out in shadows because those regions contain a weaker recorded signal. The sensor still produces some variation even when little light reaches it, so noise can make up a larger share of the recorded information. The result depends on the scene’s brightness, exposure, sensor design, camera processing, and how the footage is viewed.
What does noise look like in video?
Look closely at a dim wall, dark clothing, or a shadowed background. Luminance noise appears as light and dark grain, while chroma noise shows up as coloured speckles or blotches, often green, magenta, or blue. Some texture seems fixed in place; other noise crawls or flickers from frame to frame. Either can obscure subtle details, such as the texture of dark fabric.
Underexposed areas may look relatively smooth in the original image, then reveal pronounced grain when brightened during editing. Raising their levels makes the recorded signal and its noise more visible together. The broader topic of Image noise includes several sources and types of variation, which helps explain why different noise patterns need different treatment.
Don’t confuse digital noise with intentional film grain, which is a chosen visual texture, or compression artifacts, which may appear as blocky patches, smearing, or banding. Noise often varies at a fine pixel level, while compression damage can follow larger shapes or appear around edges. Both can be present in the same clip.
Why do dim scenes make noise more visible?
A camera records light as an image signal. In a dim scene, fewer photons reach each photosite on the sensor, so the signal is weaker relative to variations generated during capture and processing. When that weak signal is amplified to make the image brighter, noise becomes easier to see too. ISO is commonly used to adjust this amplification or gain; it doesn’t add light to the scene.
That doesn’t mean every high-ISO image will look equally noisy, or that lowering ISO always produces cleaner footage. An underexposed image recorded at a lower setting may need substantial brightening later, exposing noise in the shadows. The relationship depends on the camera’s sensor and signal processing, as well as exposure choices made during capture.
Visibility also changes with presentation. Noise may be subtle on a small monitor but obvious on a large display, or after footage is cropped and enlarged. Sharpening and contrast adjustments can make grain more pronounced, while scaling or camera noise reduction can soften it. To learn how to reduce video noise in low light effectively, first identify whether the problem is luminance grain, coloured noise, compression damage, or a combination. That diagnosis makes exposure and processing decisions more precise.
How do exposure and camera settings affect low-light noise?
Exposure choices affect both how bright a shot appears and how much shadow detail survives. The goal isn’t simply to select the lowest ISO or brighten everything. It’s to record enough usable light while keeping motion natural, depth of field intentional, and bright areas within range. A practical way to learn how to reduce video noise in low light is to adjust one exposure control at a time and judge the image on a monitor, not by the settings alone.
Does lowering ISO always reduce noise?
No. ISO is a gain or exposure-index setting, depending on the camera’s design; it doesn’t add light to the scene. Lowering ISO without changing the aperture, shutter, or lighting can leave footage underexposed. Brightening it later may make shadow noise more visible, so a lower number doesn’t automatically mean a cleaner result. Compare test footage at the exposure you’ll actually use, and assess shadow detail at the intended display size.
Camera behaviour varies. Sensor design, processing, and features such as different native gain modes affect how footage responds at different settings. Rather than chasing a universal ISO value, test the camera across its practical range in a representative scene. Keep exposure consistent between tests, then compare shadow texture, highlight retention, and colour.
Balance aperture, shutter speed, and frame rate
Opening the aperture lets more light reach the sensor, but it also reduces depth of field. That can suit a close subject against a soft background; it may be unsuitable if several subjects at different distances need to stay in focus. Cinema lenses and professional video cameras help build a setup around those creative and technical requirements.
Shutter speed also changes exposure, but it affects motion rendering. For example, footage captured at 25 frames per second with a shutter near 1/50 second generally produces familiar motion blur. A faster shutter can make movement look sharper or more staccato, while a slower one can add blur that obscures fast action. Don’t change shutter solely to lift exposure if it disrupts the movement or continuity the scene requires.
Use exposure monitoring to make the trade-offs visible. A waveform or histogram can show where tones fall, while zebras or false colour can help identify highlights approaching clipping. Check important shadow detail and bright areas together. Protect essential highlights, but avoid leaving key shadows so low that they need substantial brightening later. In a dim interior, for instance, a face should retain the detail needed for the scene without forcing a bright window into featureless white.
- Need more light? Open the aperture if the depth of field still works.
- Need natural motion? Preserve a shutter speed suited to the frame rate and action.
- Need a brightness change? Evaluate ISO and exposure using the camera’s monitoring tools, then review a test recording.
Teams refining a camera and lighting workflow can compare professional video cameras as part of that process. For guidance on matching equipment to production requirements, discuss your camera workflow with United Broadcast & Media Solutions.
Should you add light, change camera settings, or denoise in post?
Choose the correction that best preserves the scene’s essential qualities. Added light can improve recorded exposure while leaving shutter speed and aperture where they need to be. Camera adjustments may solve the problem without changing the set, but can affect motion or depth of field. A lens with greater light transmission may help if the current lens limits exposure. Post-production denoising can refine usable footage, but it can’t recreate detail that was never clearly captured.
Use this comparison to narrow the options. The best choice depends on how much control you have over the lighting, whether the scene or camera is moving, the required depth of field, and the final delivery format.
Option | Best use | Main benefit | Key trade-off
Add light | You can shape the scene’s illumination. | Improves exposure while preserving camera settings. | Added fill may alter mood, contrast, or shadows.
Adjust camera settings | You need a fast change on set. | Can raise exposure without additional equipment. | Aperture affects depth of field; shutter affects motion.
Change lens | The lens limits the light reaching the sensor. | A suitable lens may allow more light at the chosen framing. | A different lens can change framing, focus, or depth of field.
Denoise in post | Footage has usable detail but visible noise remains. | Reduces distracting noise during finishing. | Strong processing may soften detail or create artifacts.
When is adding light the most effective fix?
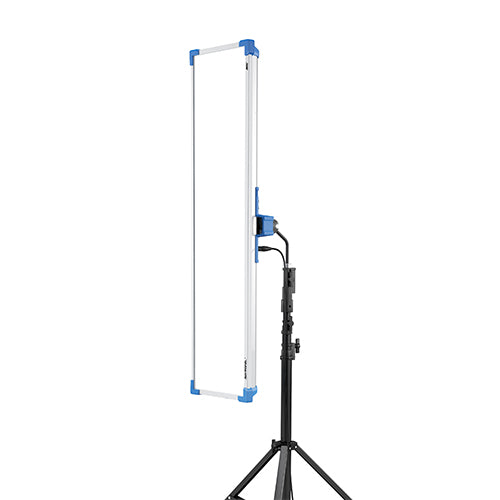
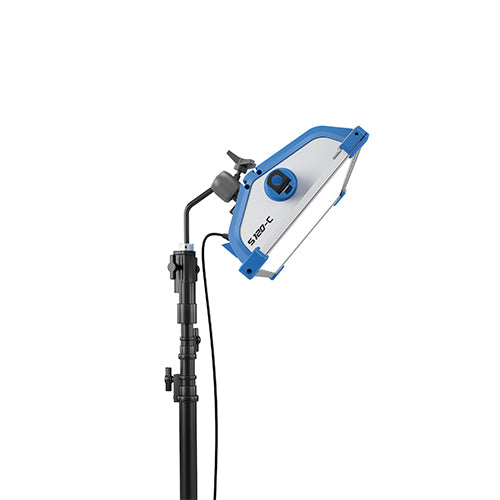
Add light when you can increase illumination without compromising the shot’s intended look. A motivated source, such as a lamp already present in the scene, can make added illumination feel natural; a subtle fill can lift a subject while retaining a darker background. Start with the direction and intensity that preserve the scene’s contrast. Professional lighting equipment can help shape controlled light on set.
When should you use post-production noise reduction?
Use denoising as a finishing step on footage that still holds the texture and detail you need. Spatial reduction evaluates noise within individual frames; temporal reduction compares information across frames, which can affect moving subjects or backgrounds. Begin with restrained settings, review playback at normal speed, and check important details at full size. Excessive processing can smear texture, soften edges, or create motion artifacts.
A practical priority for how to reduce video noise in low light is to improve capture first, then use post to refine what remains. If a scene must stay very dark, preserve its visual intent rather than lifting every shadow. If you can control the set, adjust illumination; if movement or focus requirements rule out camera changes, consider the lens and a light touch of denoising. Production teams refining their camera and lighting workflow can discuss their requirements with United Broadcast & Media Solutions.

How to reduce video noise in low light: a repeatable workflow
Use the same capture-to-review sequence for each shot. Locate the noise and decide which details matter, then improve the recorded image before relying on denoising. This makes it easier to identify whether the issue comes from limited exposure, insufficient lighting, or processing, and helps protect the scene’s intended mood.
- Identify the noisy areas. Check for grain or coloured speckles, especially in shadows. Decide which details must remain visible, such as a face, costume texture, or background element. Don’t assume every dark area needs to be brightened; deep shadows may be part of the composition.
- Lock the motion approach. Set the intended frame rate and shutter behaviour before adjusting exposure. This gives you a consistent reference and avoids solving noise by introducing unwanted motion blur or a staccato look.
- Assess light and exposure. Look at the subject and background separately. If the subject is too dark, add or reposition controllable light where practical. Then test aperture and ISO while monitoring shadow detail and highlights. Avoid lifting the whole image if doing so clips bright sources or weakens the scene’s contrast.
- Record a representative sample. Capture a short clip with the actual subject movement, lighting, and camera settings. A still frame can reveal grain, but moving footage also shows flicker, crawling noise, and motion-related issues.
- Test denoising conservatively. Apply a modest adjustment to a copy of the sample. Compare it with the original before using the treatment on a sequence or project.
Set up and test the shot before recording
Run the test under conditions that resemble the real take. Check the subject’s most important shadow detail and the brightest areas in the frame, then review the sample on a suitable display at the expected delivery resolution. If noise is already distracting before post-processing, revisit the capture setup first. If it appears mainly after lifting shadows or applying contrast, note those adjustments for the finishing stage.
Change one variable at a time during tests. For example, record a sample after adding controlled fill, then another after adjusting the aperture if the required depth of field allows it. Keeping frame rate and motion treatment fixed makes comparisons more meaningful. Record the settings with each clip so you can repeat the preferred setup for related shots.
Apply restrained denoising and check the result
Review processed and unprocessed versions at normal viewing size, then inspect areas of fine texture more closely. Watch the clip at normal speed as well as frame by frame. Look for trails around moving subjects, smeared textures, softened edges, or details that disappear. A result that looks clean when paused may show artifacts in motion.
Once the treatment looks appropriate, test it on another representative shot before applying it across similar footage. Lighting or exposure may vary between takes, so one setting may not suit every clip. This measured workflow is a practical way to learn how to reduce video noise in low light while retaining the details and movement the scene needs.
When low-light noise persists: improve the camera and lighting workflow
If noise remains distracting across test clips after you’ve adjusted exposure and applied restrained denoising, review the capture setup as a whole. Look for patterns: does noise appear mainly in underexposed shadows, across the image, or only after particular post-production adjustments? Compare clips made with different lighting and camera settings. This helps separate an exposure problem from processing choices or equipment limitations.
Keep the scene’s requirements in view. A dark, atmospheric shot may be intended to retain deep shadows, while an interview may need clear facial detail throughout. The target isn’t noise-free footage at any cost. It’s an image that preserves the details, movement, and mood needed for delivery.
Which equipment choices can support cleaner low-light capture?
Camera performance varies with sensor design, image processing, and recording settings, so sensor size alone doesn’t determine which camera will perform best for a production. Assess cameras using representative footage and the image characteristics your work requires. Professional video cameras are one part of that evaluation, not a guarantee of a particular noise level.
Lens transmission and usable aperture matter too. A lens that passes more light, used at an aperture that still gives the required depth of field, can support exposure without changing the intended motion treatment. Test the camera and lens together in the actual lighting conditions. A setup that works for a static interview may not suit a moving subject or a scene where several planes must remain in focus.
Build a supported production workflow
Review camera, lens, and lighting choices together rather than treating each as an isolated fix. For example, if a subject needs more shadow detail but a wider aperture would make focus too shallow, consider whether controllable fill light can support the desired exposure. If lighting is fixed, test the camera and lens combination against the scene’s movement, framing, and delivery requirements.
United Broadcast & Media Solutions supplies professional video cameras and lighting equipment, and provides equipment repairs and system integration. Teams assessing camera options can include the professional video camera range in their capture workflow planning. Make comparisons with test footage, using the same scene and intended output so the results support useful production decisions.
For persistent noise, document the camera, lens, lighting, exposure, and post-processing choices used in a representative shot. That record makes it easier to identify what needs adjustment and repeat the setup across related scenes. A considered approach to how to reduce video noise in low light combines equipment selection with controlled capture and careful review, without assuming any single change will suit every production.
Make your next low-light setup more intentional
Use your next shoot to establish a dependable baseline. Choose a representative scene, record the camera and lens settings, note the lighting arrangement, and review the result at the intended delivery size. That record gives your team a practical reference for future setups and helps show whether a change improves the image without disrupting its visual intent.
Learning how to reduce video noise in low light is an ongoing process of matching equipment and technique to the scene. As production requirements evolve, revisit your workflow, test adjustments before critical takes, and use technical support to assess how camera, lighting, and system choices work together. A considered setup can make low-light decisions more consistent across a production.
Take the next shoot one considered adjustment at a time. With a clear baseline and room to refine, you can make confident choices and preserve the look your production calls for.
Frequently Asked Questions
Is high ISO always the cause of noise in low-light video?
No, high ISO isn’t always the root cause. Noise can be present in a dim image before gain makes it easier to see, and underexposed footage may reveal it when brightened in editing. Compare two clips at similar final brightness rather than judging them by ISO numbers alone. The camera, exposure, lighting, and processing all influence the result, so test the settings you’ll use in the actual scene.
Can video noise be removed completely in post-production?
No, complete removal generally isn’t realistic without risking image detail. Denoising can reduce visible grain, but fine texture may be mistaken for noise, and moving subjects can develop smearing or trails. Compare a face, hair, and fabric before and after processing. If these details look waxy or indistinct, reduce the effect. Aim for less distracting noise, not an artificially smooth image.
How can I brighten low-light footage without adding more noise?
Brighten selectively rather than lifting the entire frame. In an editor, use a gentle shadow adjustment or a mask to raise the subject while keeping dark backgrounds and practical lights near their intended levels. When considering how to reduce video noise in low light, avoid stacking strong shadow lifts, contrast changes, and sharpening, since each can make artifacts more noticeable. If the subject still lacks detail, a better-exposed retake may be preferable.
What happens if I use a slower shutter speed to brighten video?
A slower shutter lets the sensor collect light for longer, but it also records more movement blur. A walking subject may look soft, and a quick hand gesture can leave a visible trail. The effect may suit a slow, atmospheric shot, but it can undermine crisp movement or make handheld footage feel less controlled. Review a short moving test before committing, especially if the clip must match other shots.
Does a faster lens reduce noise in low-light video?
A faster lens can allow more light to reach the sensor at a wider aperture, which may let you expose the image more effectively without changing the shutter. It doesn’t remove noise on its own; the benefit depends on using that extra light for the exposure you need. A wider aperture also reduces depth of field, so focus becomes more critical, particularly for a moving subject or a group at different distances.
Should in-camera noise reduction be enabled when filming?
It depends on the camera, recording workflow, and how much control you want in post. In-camera reduction may be useful for a fast turnaround, but stronger processing can smooth skin, hair, or textured surfaces. Record a short comparison with the feature on and off, then inspect motion as well as still frames. If you plan to apply noise reduction during editing, avoid unintentionally processing the image twice.
Why does video noise look worse after I export or upload a clip?
Exporting or uploading can make noise more apparent if the image is compressed, resized, sharpened, or viewed on a different display. Dark gradients may break into visible bands, while fine grain can turn into blocky or crawling artifacts after a platform recompresses the file. Match export dimensions and frame rate to your delivery target, use an appropriate quality setting, and review the uploaded version rather than relying only on the editing preview.


