

Essential Grip Gear: 2026 Buying Guide for Small Crews
The best grip package for a small crew isn’t the biggest one. It’s the one that safely supports the lighting setups you actually use. Choosing essential grip equipment for a small crew means balancing stability and capacity with what you can transport and store.
A stand that’s easy to carry may not suit every load, while extra arms, clamps, and frames add weight, setup time, and storage demands. A compact kit doesn’t have to compromise safety. Match support gear to fixture weight, modifiers, shooting locations, and the number of people available to rig and strike. For stands supporting elevated gear, appropriate ballast and correct rigging are part of the setup, not afterthoughts.
This guide helps you prioritize versatile stands and accessories, distinguish core items from useful upgrades, and check compatibility and load limits before a setup goes overhead. It also explains how lighting choices affect grip requirements, so you can plan a practical package for interviews, small interiors, and location work, then expand it as production needs change.
Key Takeaways
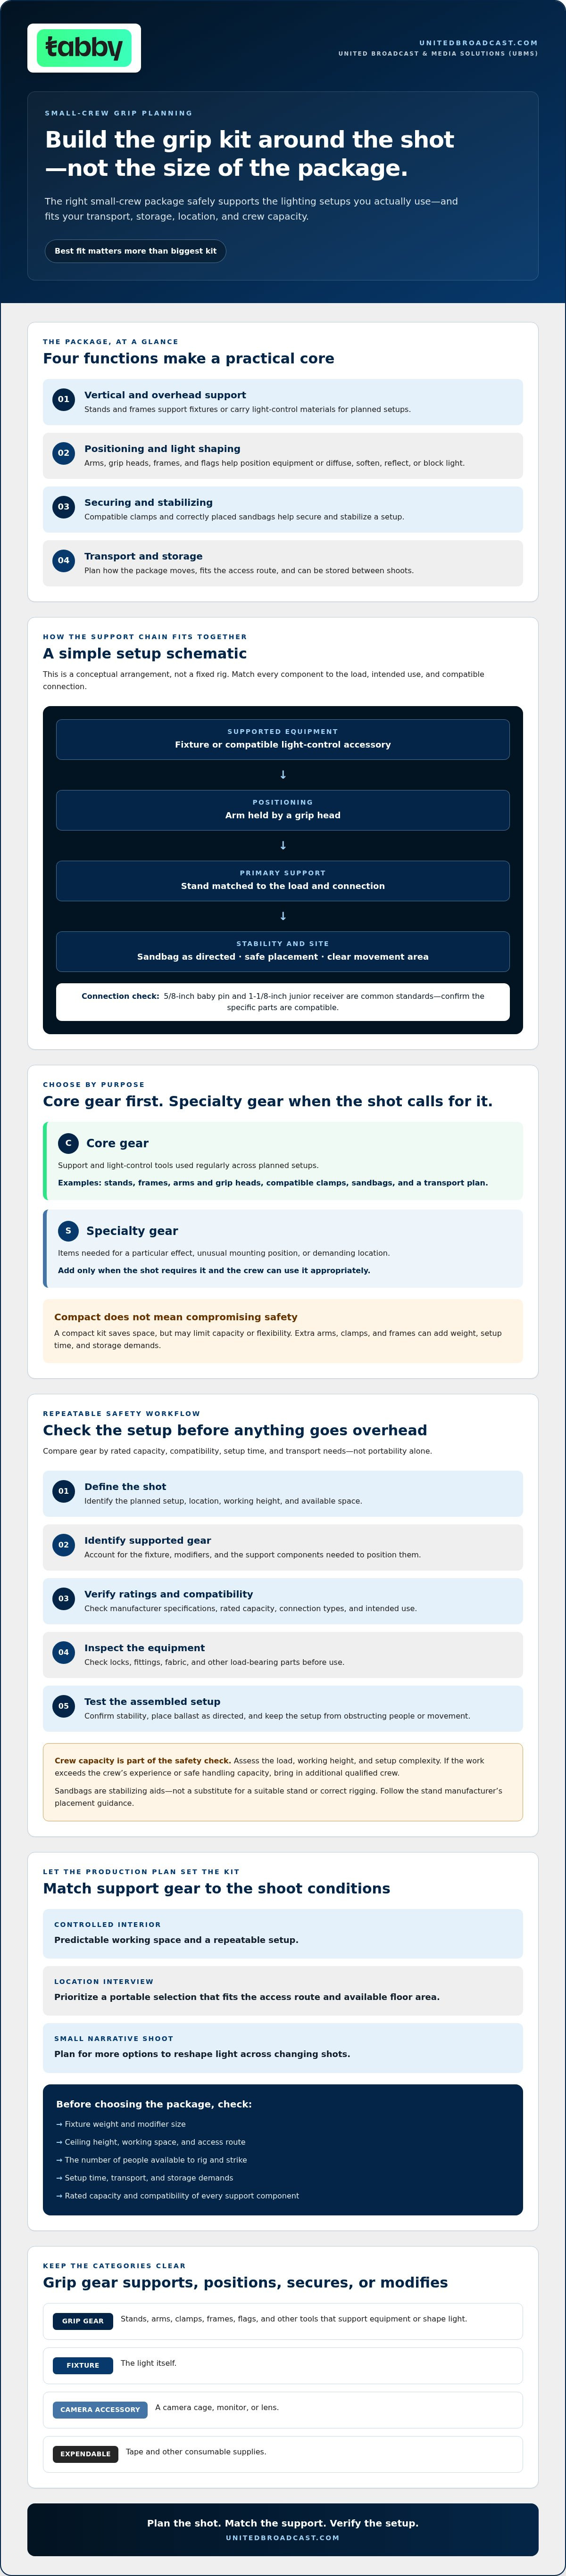
- Prioritize essential grip equipment for a small crew by function: vertical and overhead support, light shaping, securing, or transport.
- Compare stands and accessories by rated capacity, compatibility, setup time, and transport needs, not portability alone.
- Use a repeatable safety workflow: define the shot, identify supported gear, verify ratings, inspect equipment, and test the setup.
- Build around the fixtures and modifiers in your lighting plan. A compact kit saves space but may limit capacity or flexibility.
- Choose a package for your crew’s actual shooting conditions, then add equipment when production requirements change.
What Counts as Essential Grip Equipment for a Small Crew?
Grip equipment supports, positions, secures, or modifies lighting and camera setups. It includes stands, arms, clamps, frames, flags, and other tools that hold fixtures or shape light. A light itself is a fixture; a camera cage, monitor, or lens is a camera accessory; tape and other consumable supplies are expendables. These categories work together, but they serve different functions, so separate them when planning a kit.
A small-crew grip kit is the minimum adaptable support gear needed to rig planned shots safely, without carrying a full production package. The right essentials depend on the fixtures and modifiers, the location, the shot, and the crew’s ability to set up and manage the equipment safely. For a foundational overview of the grip role and its responsibilities, see Grip (occupation).
What Does a Grip Do on a Small Production?
Grip crew members position stands, frames, flags, and related tools to support equipment or control how light reaches the scene. On a lean crew, these tasks may be shared, but that doesn’t mean one person should handle every lift or rigging task. Assess the load, working height, and setup complexity first. If the work exceeds the crew’s experience or safe handling capacity, bring in additional qualified crew.
How the Shoot Determines What Is Essential
A controlled interior may offer predictable working space and a repeatable setup. A location interview may call for a more portable selection that fits the access route and available floor area. A small narrative shoot may need more options for reshaping light across changing shots. In each case, consider fixture weight, modifier size, ceiling height, and whether there is room to position and secure stands without obstructing people or movement.
Use your shot plan to sort items into two groups:
- Core gear: Support and light-control tools used regularly across planned setups.
- Specialty gear: Items needed only for a particular effect, unusual mounting position, or demanding location.
Start with the core list, then add specialty pieces only when a shot requires them and the crew can use them appropriately. Match every support item to the equipment it must hold, and check its instructions and rated capacity before use. When selecting professional lighting equipment, plan the grip around the fixtures and modifiers you expect to operate. Confirm current availability and compatibility before purchase.
Which Core Grip Equipment Should a Small Crew Prioritize?
Build the package by function, then match each support component to the fixture, modifier, and working conditions. A stand provides vertical support; a frame can carry diffusion or a flag; arms and grip heads position equipment; clamps secure compatible attachments; and sandbags help stabilize stands. A transport case or cart may also be useful if it protects gear and makes moving it manageable for the crew.
A practical core checklist includes stands for vertical support, frames for overhead work or light control, arms and grip heads for positioning, clamps and sandbags for securing, and a plan for transport. This is a planning guide, not a fixed package. The right selection depends on the actual load, location, and available crew.
Stands, Grip Heads, Arms, and Sandbags
Stands carry the load. A grip head attaches to a stand and holds an arm, while the arm positions a frame or other compatible accessory. Check each component’s manufacturer specifications and connection type. For example, verify that the stand’s pin or receiver matches the head or accessory. The 5/8-inch baby pin and 1-1/8-inch junior receiver are common standards, but confirm that the specific parts are compatible.
Sandbags are stabilizing aids, not a substitute for a suitable stand or correct rigging. Place them as directed by the stand manufacturer, making sure they’re secure and won’t obstruct movement. Before use, inspect locks, fittings, fabric, and other load-bearing parts, then confirm that the assembled setup is stable. Follow handling guidance and safe working practices, such as those outlined in CalArts’ Production Safety Practices.
Frames, Flags, Clamps, and Light Control
Frames hold materials used to diffuse, soften, reflect, or block light. Select frame dimensions and materials to suit the fixture, intended effect, available space, and crew’s ability to rig and manage them. A larger frame may offer more control, but it also takes more room and can be harder for a lean crew to position safely.
Clamps attach compatible accessories to suitable support points. They aren’t replacements for rated stands or other primary support. Confirm the clamp’s intended use, capacity, and connection. A secure fit alone doesn’t mean the whole rig is safe. Match the complete assembly, from stand through attachment, to the load and manufacturer instructions.
Grip requirements follow the lighting plan, so review fixtures and modifiers alongside the support gear. Explore professional lighting equipment from UBMS, and use the UBMS contact page for questions about lighting and equipment requirements.
How Should a Small Crew Compare Grip Gear Before Buying?
Compare gear against the setups you expect to build, not its appearance or a single feature such as low weight. For each item, assess how it will perform in transport, setup, and use, then confirm its intended application in the manufacturer’s documentation. This helps identify which pieces of essential grip equipment for a small crew will earn a place in the kit.
| Factor | What to check | Practical trade-off |
|---|---|---|
| Compactness | Storage footprint and ease of carrying through access routes. | Smaller or lighter gear travels more easily, but may not suit every setup. |
| Stability | Construction, footprint, locking points, and suitability for the location. | Greater stability may require more space and effort to move. |
| Rated capacity | Manufacturer’s rating for the intended configuration and use. | Capacity must suit the full supported setup, not just the fixture. |
| Setup time | How many steps, adjustments, or crew members are needed. | Quick adjustments help on changing setups, but must still lock securely. |
| Transport | Whether components fit the vehicle and can be loaded and stored safely. | A compact kit saves space; bulky frames can dictate transport needs. |
| Compatibility | Connections and dimensions across stands, heads, arms, and accessories. | Compatible components are more versatile; mismatched parts can limit use. |
Portable Gear Versus Higher-Capacity Support
Portable equipment can reduce storage demands and simplify location moves. Higher-capacity support may be necessary for heavier fixtures, larger modifiers, or configurations that need a more substantial base. Identify the heaviest intended setup, including attached accessories, then compare it with the manufacturer’s rating for the exact equipment and use. Overhead work and large frames need additional risk assessment, suitable placement, and crew with the right experience.
Compatibility, Build Quality, and Future Expansion
Check every connection in the chain, from stand to grip head, arm, fixture, or accessory. Confirm dimensions and intended use rather than assuming similar-looking parts will fit or perform alike. Consider durability, replaceable components, inspection needs, and what service support the manufacturer or supplier provides. Prioritize versatile items used across planned setups, then add specialty tools when production needs justify them.
Expansion should follow documented requirements, not hypothetical future shoots. Keep a record of recurring setups and the equipment they require. If lighting is part of that plan, review fixture and modifier requirements alongside your grip choices, and confirm current availability and compatibility. UBMS supplies professional lighting equipment for production needs.
How Can a Small Crew Build and Use a Safer Grip Package?
A safer setup starts before equipment leaves storage. Use the same sequence for each shot, and pause to reassess if the location, gear, or available crew changes. Essential grip equipment for a small crew is useful only when it suits the planned load and can be handled safely by the people on set.
Plan the Setup Around the Shot and Crew
Map fixture and modifier positions before packing. Account for access routes, floor space, nearby activity, and where stands can be placed without creating an obstruction. Assign setup, spotting, and adjustment responsibilities according to crew members’ experience and the task’s risk. A lean crew can share tasks, but don’t rush or ask anyone to manage a lift beyond their capability.
- Define the shot. Identify the intended lighting and camera positions, including any overhead or elevated work.
- List supported gear. Record each fixture, modifier, frame, and accessory that the support setup must carry.
- Check ratings. Confirm the manufacturer’s specifications and instructions for each component and the assembled configuration.
- Plan placement. Check the support surface, working space, and access routes. Plan how stands will be secured as directed by the manufacturer.
- Inspect equipment. Look for damage or wear on stands, locks, grip heads, fasteners, and other load-bearing parts. Check cables for hazards in the work area.
- Test before use. Confirm connections are secure and the setup is stable before putting it into operation. Keep people clear while adjustments are made.
Inspect, Secure, and Strike Equipment Correctly
Communicate before raising, moving, or adjusting a rig. Name who is handling each task and make sure the crew knows when a setup is changing. Follow manufacturer instructions throughout, and don’t use equipment in questionable condition or beyond its stated use. If the setup becomes unstable, stop and reassess instead of trying to correct it under pressure.
Plan the strike as carefully as the setup. Clear the area, communicate before lowering equipment, and remove supported gear in a controlled sequence. A short pre-shoot checklist helps prevent missed steps:
- Confirm the equipment inventory against the shot plan.
- Check transport and storage for stands, frames, and accessories.
- Verify there’s enough setup space and clear access.
- Inspect equipment before rigging and after use.
- Assign responsibilities for setup, adjustments, and strike.
How Do You Choose a Grip Package That Works With Your Lighting?
Start with the lighting plan, not a preset package. A fixture’s weight, mounting interface, modifier, and placement all affect the support equipment required. Essential grip equipment for a small crew is the gear that safely supports planned setups and fits the crew’s handling capacity, location, and transport limits.
Match Support Gear to Fixtures and Modifiers
Document each fixture and modifier before choosing stands, arms, heads, or frames. Check the manufacturer’s specifications for weight, mounting requirements, and intended use, then verify that every connection in the support chain is compatible. A modifier can change the demands on a setup, so assess the complete configuration rather than selecting support based on the light alone.
Larger frames and overhead arrangements need particular care. Confirm that the support is rated for the intended configuration, consider where it will be placed, and make sure the crew can rig and manage it safely. Don’t assume a lighting collection includes stands or grip accessories. Check product details and current availability before purchase. UBMS’s professional lighting equipment can help you plan the fixture side of your package.
| Package approach | Strengths | Limitations to consider |
|---|---|---|
| Compact kit | Requires less storage and can be easier to transport and deploy for familiar, simpler setups. | May lack the capacity, reach, or range of light-control options needed for heavier fixtures or larger modifiers. |
| Expanded kit | Can support a wider variety of fixtures, modifiers, and production setups. | Takes more space to store and transport, and may require more time and crew to rig safely. |
When to Expand the Kit or Get Expert Input
Expand when production records show recurring needs, such as supporting a different fixture configuration, shaping light with a larger frame, or setting up multiple lighting positions at once. Add duplicate essentials when simultaneous setups or repeated changes make sharing one item impractical. Avoid buying specialty tools for imagined shoots that aren’t part of the production plan.
If fixture compatibility, system integration, or technical equipment requirements are unclear, seek advice before committing to a setup. UBMS offers professional lighting and technical equipment, along with system integration services for broadcast environments and studio setups. Check current availability and compatibility for the specific equipment you’re considering.
Build a Grip Package That Grows With Your Production
The right kit is not the largest one. It’s a carefully matched set of support and light-control tools for the fixtures, modifiers, locations, and crew you work with. Prioritize versatile essentials, check compatibility and manufacturer ratings, and expand only when recurring production needs call for more capacity or specialty gear.
Planning the essential grip equipment for a small crew also means treating safety as part of every setup. Define the shot, assign clear responsibilities, inspect equipment, and reassess whenever conditions change. A considered package can help your crew work efficiently without carrying gear that isn’t suited to the production.
United Broadcast & Media Solutions provides professional lighting and broadcast equipment sales, along with technical services that include system integration and a dedicated equipment service center. Build your grip plan around your actual lighting and equipment requirements, and contact UBMS to discuss the equipment side of your setup.
Frequently Asked Questions
What is the most essential grip equipment for a small crew?
The most essential grip equipment for a small crew depends on the shots and lighting it needs to support. A practical starting point may include suitable stands, compatible grip heads and arms, clamps, sandbags, and frames or flags for light control. Choose items for the actual fixtures and modifiers in your plan, and verify the manufacturer’s intended use and capacity. No single list suits every crew or production.
Do small film crews need C-stands?
Small film crews need C-stands only when their planned setups require them and the crew can use them safely. They can support compatible grip heads, arms, and frames, but their size, weight, transport needs, and setup requirements may not suit every location. Check the stand’s specifications and compatibility with the intended load. For simpler setups, another appropriately rated support option may be more practical.
How many light stands does a small crew need?
There’s no fixed number of light stands that fits every small crew. Base the count on how many fixtures or supported elements must be positioned at the same time, whether setups change during the shoot, and what the crew can transport and rig safely. List the planned lighting positions, then check which require independent support. Don’t count a stand as suitable until its rating and configuration match its intended load.
Can one person safely set up grip equipment alone?
One person may be able to set up a simple, low-risk configuration if they’re competent with the equipment and follow manufacturer instructions. That doesn’t make solo setup appropriate for every task. Heavy or awkward loads, overhead work, large frames, and unstable conditions may require additional qualified crew. Assess the load, height, location, and handling demands first. If the setup exceeds one person’s ability to manage it safely, stop and get help.
What should I check before buying grip equipment?
Check intended use, rated capacity, connection types, dimensions, condition, transport needs, and compatibility across the complete support setup. Compare those details with the heaviest configuration you actually plan to use, including fixtures and modifiers. Review the manufacturer’s instructions rather than relying on appearance or a general description. Also consider inspection requirements and whether components can be maintained or replaced. Confirm the equipment suits your locations and crew’s safe handling capacity.
What is the difference between grip equipment and lighting equipment?
Lighting equipment produces or emits light, while grip equipment supports, positions, secures, or shapes lighting setups. A fixture is lighting equipment; a stand, grip head, arm, clamp, flag, or frame is grip gear. The categories work together, but they aren’t interchangeable. Plan support around the specific fixture and modifier, and confirm that all connections and load ratings are suitable. Don’t assume a lighting product collection includes grip accessories.
Should a small crew buy a complete grip package or individual items?
Buy a complete package only if its components match your recurring production needs, compatibility requirements, transport limits, and crew capacity. Individual items can make more sense when you already own suitable support gear or need to fill specific gaps. Before deciding, compare the package contents with a shot-based equipment list and check each component’s specifications. Expand from documented needs, not imagined future setups, and avoid buying tools your crew won’t use.


